
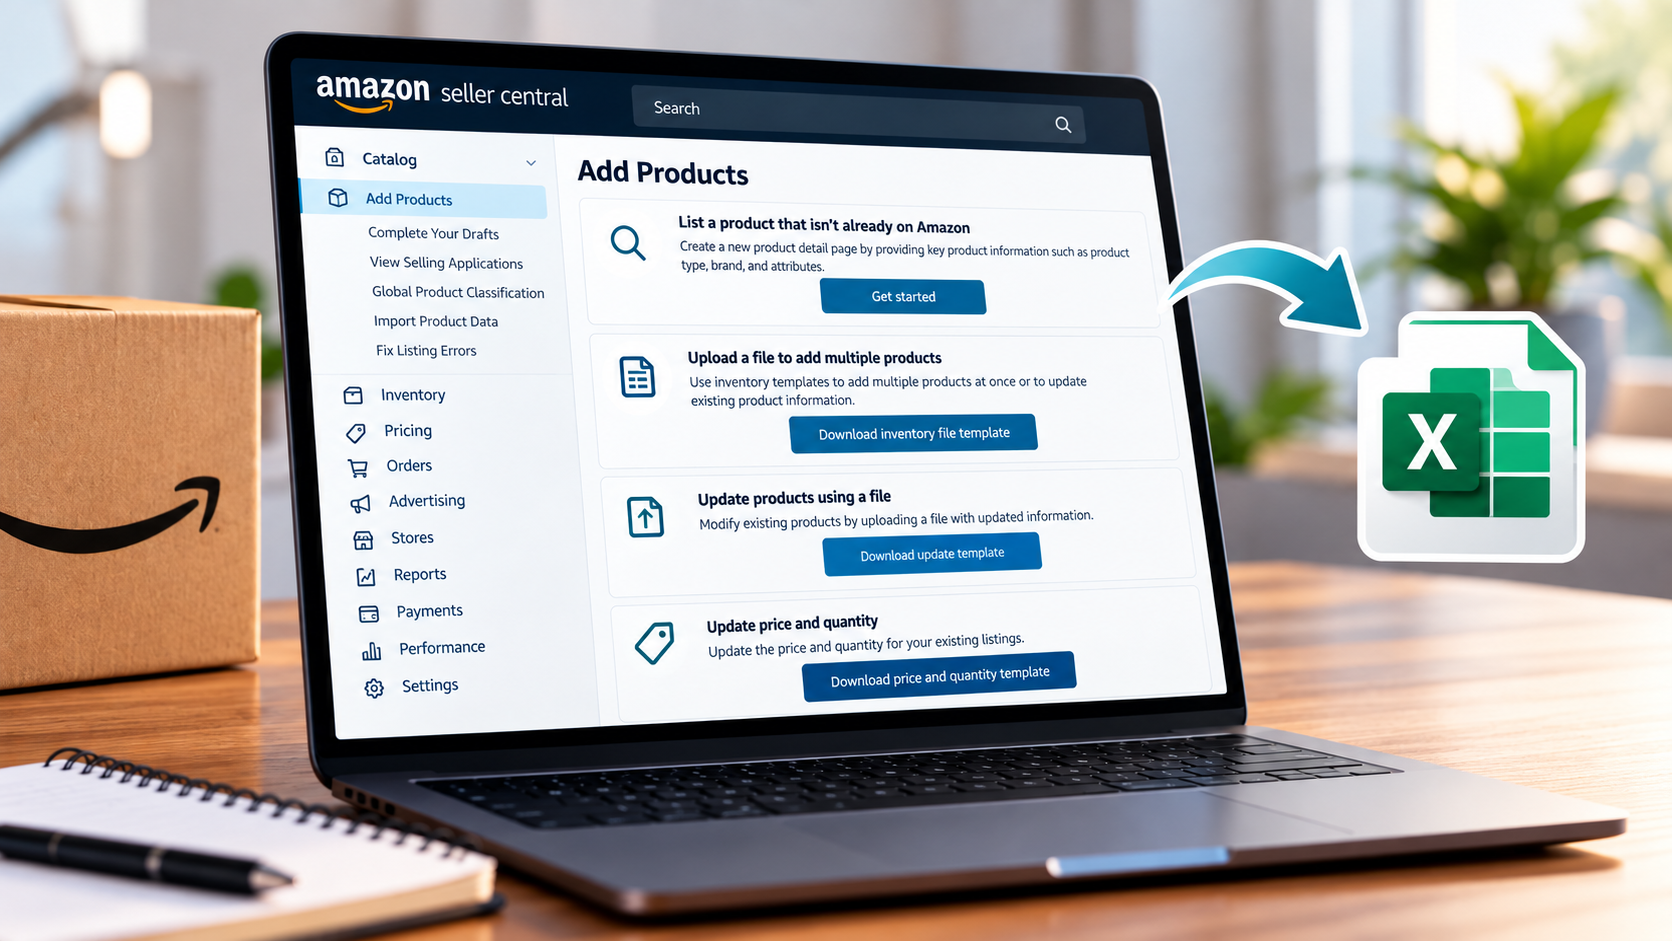
Amazon Flat Files: Less Complicated Than You Think
How to make listing changes step by step — and why you should always check your data before uploading.
You’re sitting in front of Amazon Seller Central, trying to update a product title, change a bullet point, or correct a product attribute.
Shouldn’t be a big deal.
You open the listing, make your changes, save, and wait. Except nothing happens. Even after trying again, Amazon still displays the old information.
Or Amazon changes something in Seller Central, introducing a bug that prevents you from saving listing updates.
Wonderful, isn’t it?
So why not try using a flat file instead?
Has it never worked for you? Or have you simply never taken the time to figure it out?
There are probably plenty of reasons why you’ve avoided flat files.
But they’re actually quite useful.
Especially when you need to update several pieces of product information or when changes made through the usual Seller Central interface don’t work as expected.
There is one thing you should know, though: Amazon can technically accept your file even if you’ve just introduced an error into your listing.
Or into 100 listings…
So let’s look at how to prepare and upload a flat file, and then check whether your changes were actually applied.
What Exactly Is an Amazon Flat File?
A flat file is a spreadsheet-based file that allows you to submit structured product information to Amazon.
Instead of entering every detail individually in Seller Central, you edit the relevant fields in a template and upload the completed file.
Depending on the template and what you’re trying to accomplish, you can use flat files to manage information such as:
- Product titles and bullet points
- Product descriptions
- Dimensions, materials, and other product attributes
- Variation information
- Offer data, such as prices and inventory
Which fields are available and which are required depends on factors such as the product category, marketplace, and template you’re using.
The template you need also depends on what you want to change. Updating product attributes may require a different template from updating prices, for example.
By the way, flat files aren’t reserved for large sellers. You can use them even if you only want to edit a single SKU.
And that’s exactly where we’ll start.
Why Are So Many Sellers Reluctant to Use Flat Files?
If you’ve spent years working exclusively with the Seller Central interface, you know the routine.
Click the product title, make your change, save. Done.
A flat file, on the other hand, looks complicated at first.
You’ll find dozens of columns, even though you might only need a handful. Some fields require predefined values, while others use technical names. Then there are multiple worksheets containing instructions and definitions.
It looks like a lot of work.
On top of that, for many years, uploading files regularly resulted in error messages that only Amazon Seller Support could help resolve.
And anyone familiar with the quality of their responses and their response times will understand why sellers aren’t exactly eager to contact them.
Amazon has made changes to the process over the years.
But here’s the important part:
You don’t necessarily need to fill in every field just because it’s marked in red in the template.
When making a targeted update, what matters is choosing the correct template and update method, and understanding exactly which information is required for that particular operation.
Amazon now provides more guidance on this, too.
The real challenge is understanding which data you’re submitting to Amazon and what effect that submission might have.
Step 1: Download the Right Flat File Template
Open Seller Central and navigate to the section for uploading products using files.
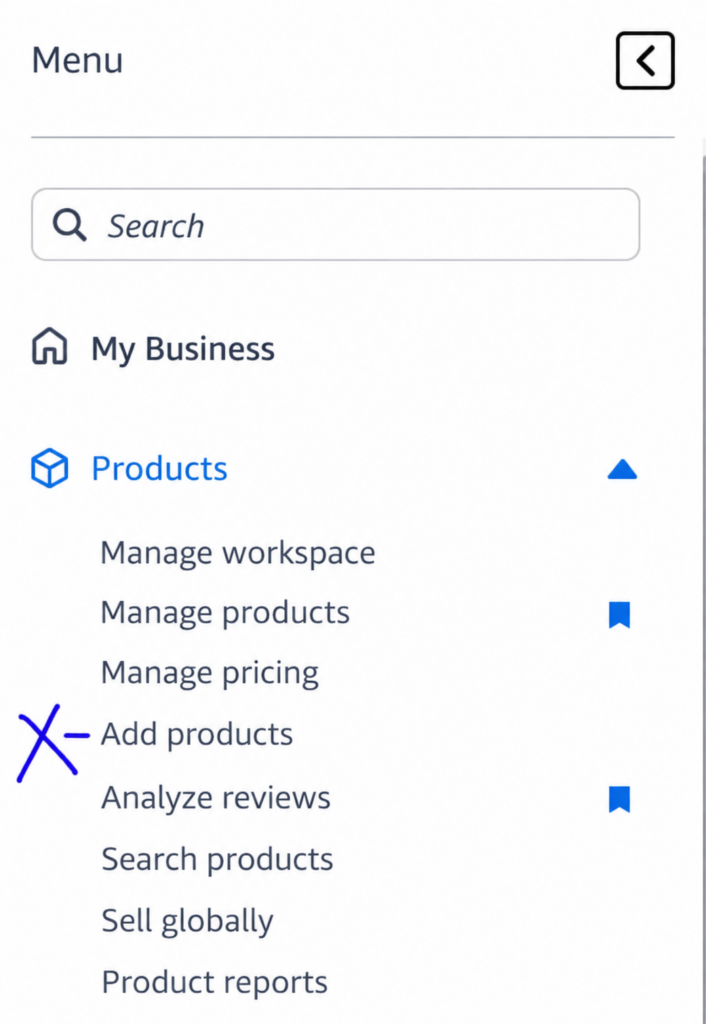
There, you can download a suitable template for your marketplace and product type.
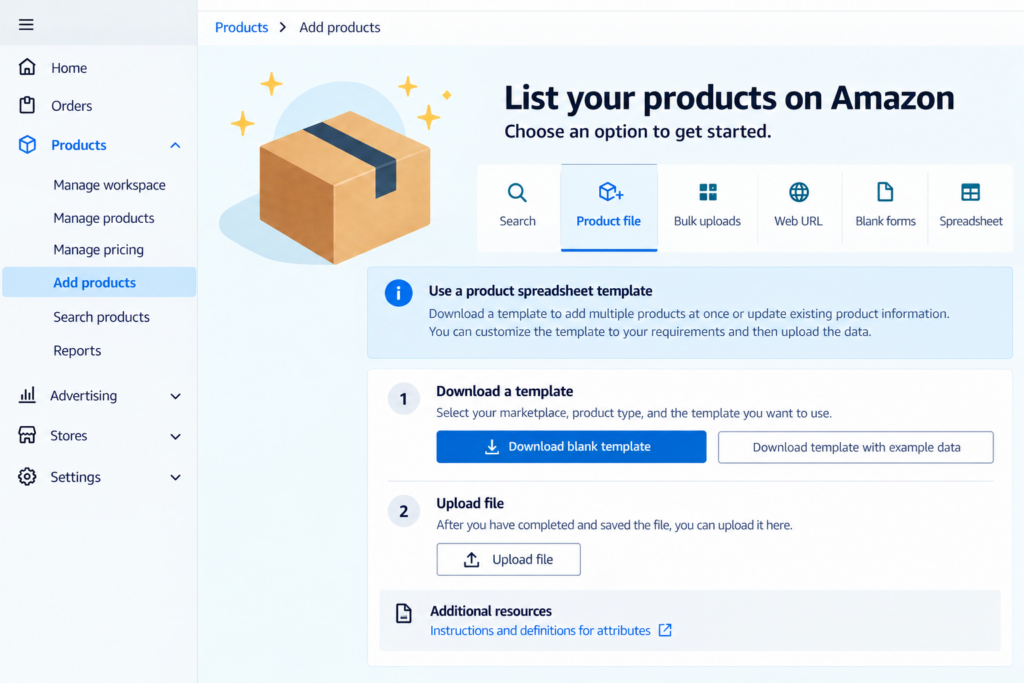
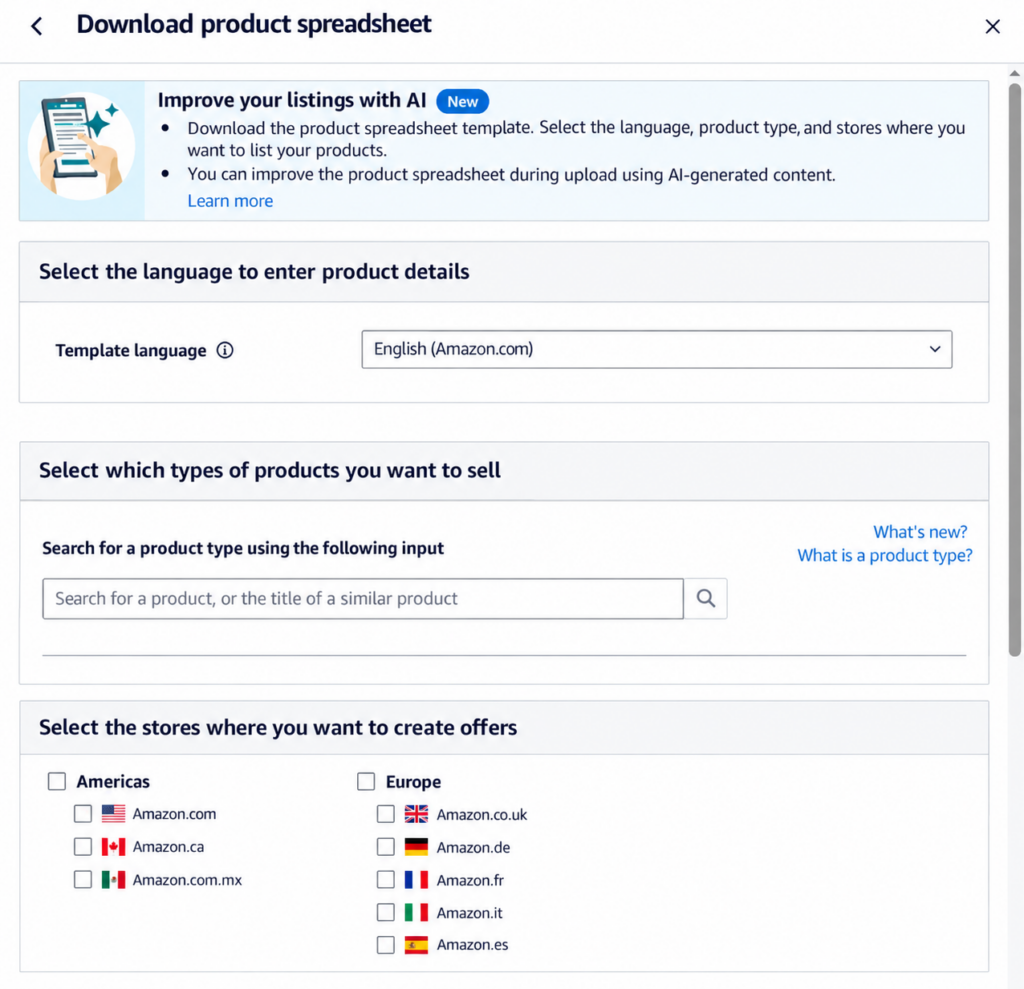
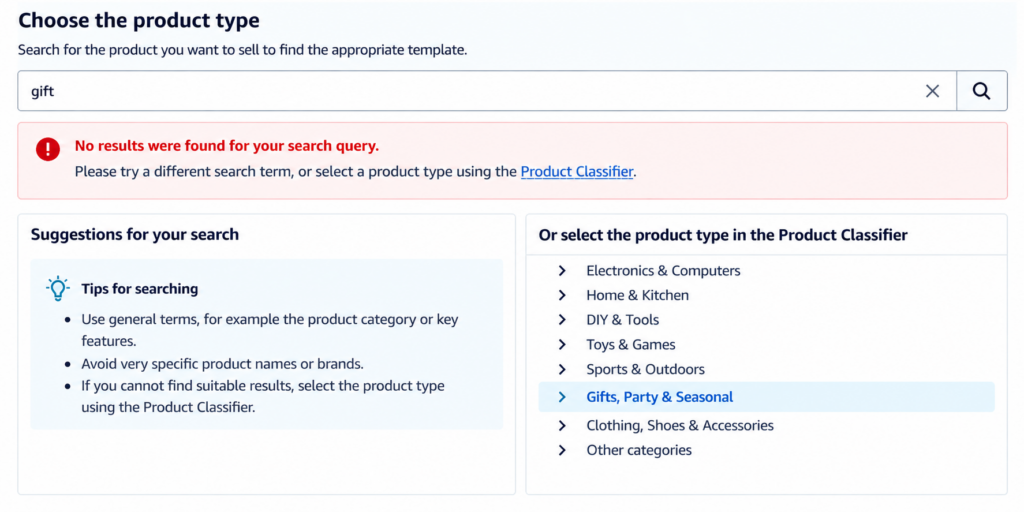
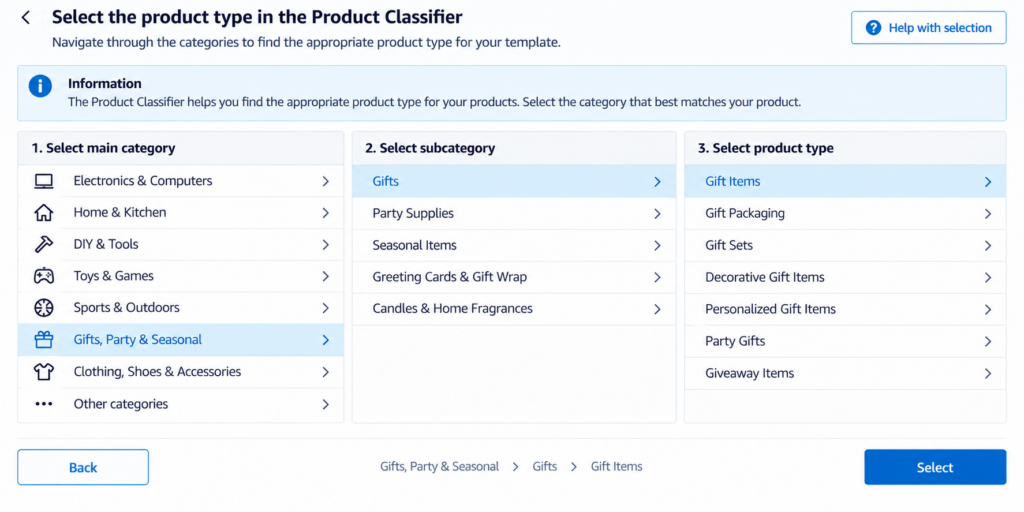
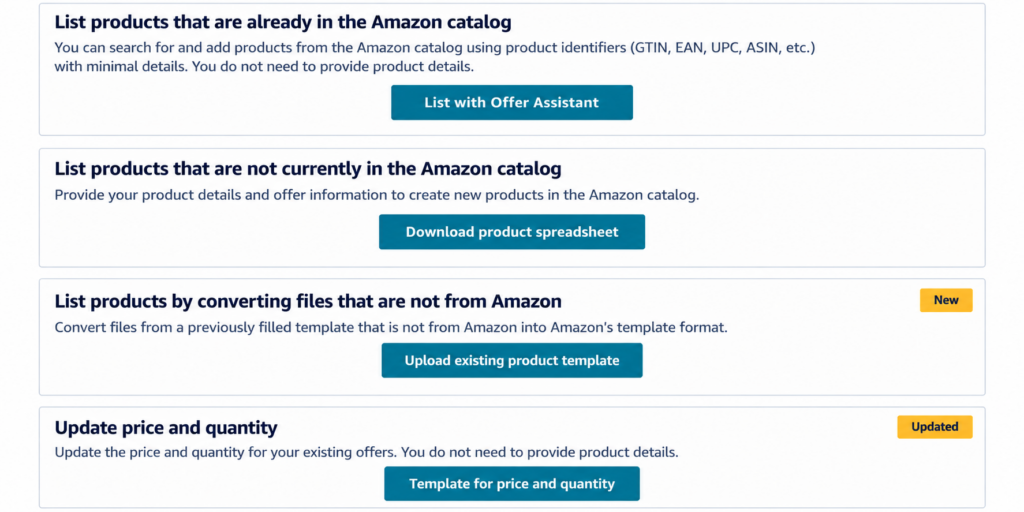
The terminology can be a little confusing at first. Even if you only want to edit an existing listing, you may need to access the appropriate product template through a section intended for listing products that aren’t currently in Amazon’s catalog.
That doesn’t automatically mean you’re creating a new product.
What matters is which template you download, which update method you select, and what information you enter into the file.
Make absolutely sure you choose the correct template.
A file designed for a different product category may contain different attributes, required fields, and accepted values.
Amazon regularly updates Seller Central, so menu names and locations may differ from the screenshots shown here.
Next, open the downloaded file.
Before entering any data, take a look at the worksheets it contains.
Depending on the template, you’ll find instructions for using the file, definitions of individual attributes, and rules for accepted values.
These aren’t just there for decoration.
Especially when dealing with fields that require predefined values, you should follow the instructions provided in the template.
If you’re unsure, keep the product listing you’re editing open in your browser or look up the relevant information in Seller Central.
Step 2: Decide Exactly What You Want to Change
For our example, we’re selling a fictional gift item.
The current product title is:
Ilona – The Cheerful Cat Thermos Bottle
We want to add a relevant product feature:
Leakproof.
It’s a relatively small change.
We don’t need to rewrite the product description, every bullet point, and all the other attributes at the same time.
And that’s my recommendation for your first flat file upload:
Start with a single SKU and one clearly defined change.
That makes it much easier to determine afterward whether the submission worked.
Important: The identification fields and other information you need to complete depend on the template and update method you’re using.
Step 3: Choose the Correct Update Method
Now we come to something you really shouldn’t skip.
Amazon distinguishes between different types of data submissions when processing file uploads.
Depending on the template, you may be able to update existing information selectively or submit a more comprehensive product record.
That’s an important difference.
After all, you don’t want to accidentally change or remove existing information when all you intended to do was update a product title.
Check the instructions in your specific template to determine which update method is appropriate for your situation and how Amazon handles fields that are left blank.
Don’t assume that empty cells will always be ignored.
Their meaning can depend on the template and the update method being used.
To be safe, test the process with a single SKU first.
Step 4: Enter Your Changes into the Flat File
Now it’s time to edit the file.
Open the worksheet where product information is entered.
First, locate the fields Amazon uses to identify your product.
The instructions included with your downloaded template will tell you which details are required.
In our example, we want to update the title of our fictional cat thermos bottle.
Current title:
Ilona – The Cheerful Cat Thermos Bottle
New title:
Ilona – The Cheerful Cat Thermos Bottle, Leakproof
Find the appropriate product title field in the template and enter the new value.
Make sure you’re editing the row for the correct product.
Next, select the update method intended for your planned change.
For a targeted update, check whether the template supports a partial update and which additional fields need to be completed.
Important: Don’t delete existing information just because you think it’s unnecessary.
An empty cell doesn’t necessarily mean Amazon will leave the previous value unchanged.
Finally, save your file in the required format.
Your preparation is now complete.
But I wouldn’t upload it just yet.
First comes the most important step: checking whether everything makes sense.
Step 5: Data Validation — The Most Important Part
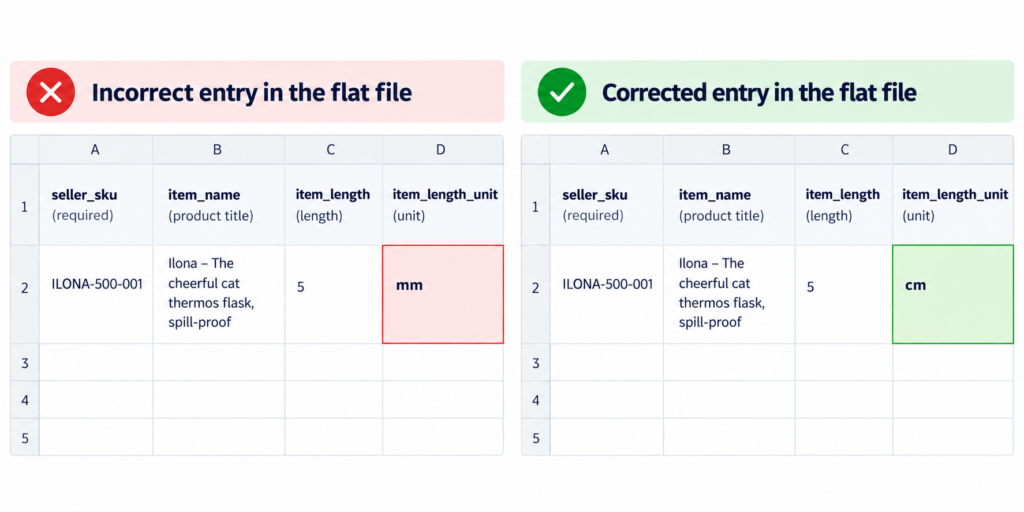
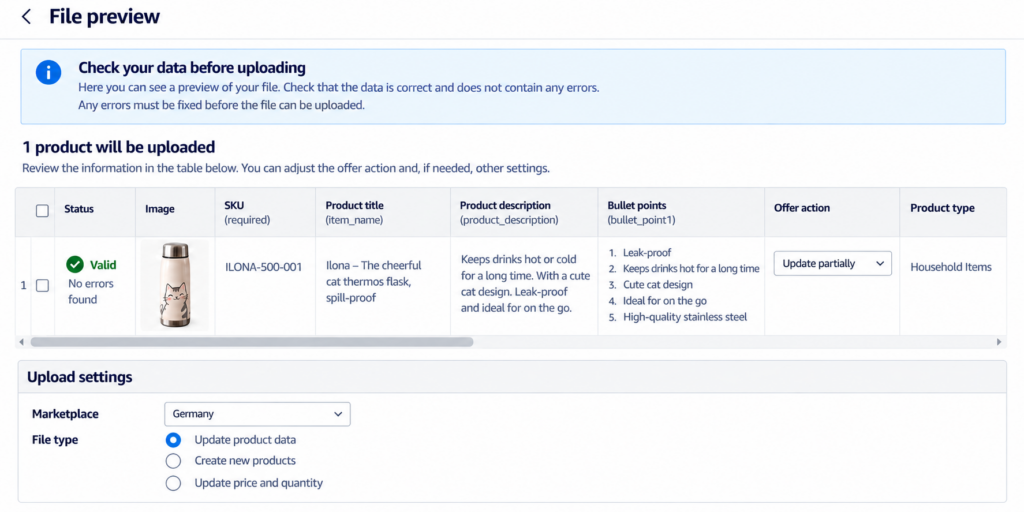
Before uploading your file, carefully review everything you’ve entered.
When processing your submission, Amazon checks whether the file meets certain technical and catalog requirements.
But that doesn’t replace checking the actual content.
A typo or an incorrect product attribute can still be accepted and subsequently displayed in your listing.
That’s why you should compare every change against the actual product information before uploading.
My Checklist Before Every Upload
1. Are the product identifiers correct?
Check that you’re editing the intended SKU and that all identifying information belongs to the correct product.
2. Is the content accurate?
Review the updated text. Do the dimensions, materials, functions, and other product features match the actual product?
3. Have I changed only the intended fields?
Compare your edited file with the original version.
Pay particular attention to accidentally overwritten cells and unintended changes to other attributes.
4. Do the entries comply with the template requirements?
Check required fields, accepted values, data formats, and the selected update method.
5. Have prices, inventory, and variation information remained unchanged?
If these details aren’t part of your planned update, make especially sure you haven’t accidentally affected them.
My personal tip: Save an unchanged copy of your original file before editing it.
That way, you can always check exactly what you’ve changed.
Step 6: Upload the Flat File and Check the Processing Report
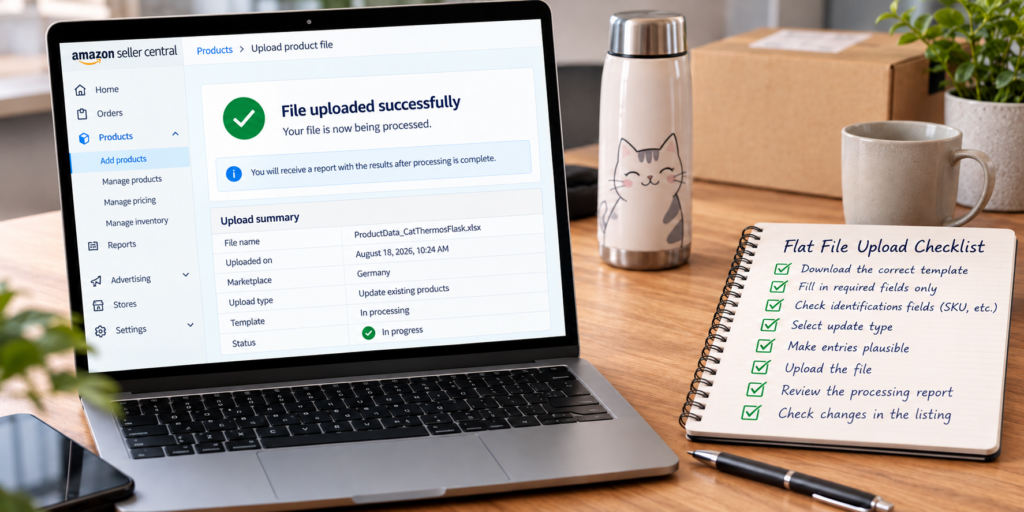
Once you’ve prepared and checked your file, upload it through the appropriate section in Seller Central.
Amazon will then process the file and provide information about the results.
This is where you shouldn’t simply stop once the upload is complete.
Open the processing report and check whether the records were processed successfully or whether Amazon has reported any errors or warnings.
Depending on the issue, the report may point to problematic attributes, missing required information, or other processing difficulties.
Step 7: Check Whether Your Changes Actually Went Through
Your file was processed successfully?
Great. But we’re not finished yet.
First, check Seller Central to see whether the correct information has been saved for the intended product.
Give it some time.
Then open the product detail page and check whether the change is visible there as well.
Why the extra step?
Because Amazon can combine product information from different data contributions.
Successfully submitting your data doesn’t necessarily mean Amazon will display your exact value on the public product detail page.
It may also take some time before a change becomes visible.
So the processing report initially answers one question:
Did Amazon process my file?
Whether the intended result was actually achieved is something you need to check separately.
What If Amazon Doesn’t Apply Your Changes?
You’ve uploaded the file, the processing report shows no errors, but the product detail page still displays the old information.
Welcome to everyday life as an Amazon seller.
Before repeatedly uploading the same file, though, take a systematic approach.
1. Check Your File Again
Are the SKU, attribute, product type, and update method correct?
Did you enter the intended value in the right field?
2. Review the Processing Report Carefully
Don’t just check whether the upload was completed.
Look for any messages associated with the affected record.
3. Compare Seller Central with the Product Detail Page
Is the new value stored in Seller Central but not visible publicly?
Or was the change never applied during processing?
This distinction helps you narrow down the problem.
4. Consider Possible Data Conflicts
Amazon doesn’t manage product information based solely on your most recent submission.
Under certain circumstances, other data contributions or catalog-level requirements can influence which information is displayed.
5. Give It Some Time
Sometimes it simply takes longer.
Wait a few hours.
6. Contact Seller Support If Necessary
Document the issue as precisely as possible.
Include the affected SKU or ASIN, the attribute you wanted to change, and the information currently being displayed instead.
Keep a record of the batch ID.
Seller Support will need it to investigate your upload. You can find it in the upload section next to the submitted file.
My Conclusion: Flat Files Aren’t That Scary After All
Flat files look more complicated at first than they actually are.
If you use the right template, prepare your changes carefully, and start with a single SKU, you can familiarize yourself with the process step by step.
The most important part happens before the upload: validating your data.
After all, Amazon can technically accept your file without recognizing that you’ve entered an incorrect product attribute, for example.
So here’s my approach:
Prepare the data, double-check everything, upload the file, read the processing report, and then verify the actual listing.
And if Seller Central once again refuses to save your changes, a flat file gives you another way to submit your product information in a structured format.
That intimidating wall of Excel columns becomes a lot less frightening once you know which ones you actually need.
Further Information
https://sellercentral.amazon.com/help/hub
https://sellercentral.amazon.com/listing/upload
https://sellercentral.amazon.com/help/hub/reference/G202121200
Important Notes
This article is provided for general informational purposes and explains how to work with Amazon flat files using a fictional example. It is not an official Amazon guide.
Amazon may change its user interface, templates, required fields, and processing procedures at any time. The current requirements published by Amazon for the relevant marketplace, product type, and use case always take precedence.
Always verify your entries against the actual product information before uploading. Afterward, review the processing report and check the result in the relevant listing. A successful file submission guarantees neither the accuracy of the information nor its appearance on the public product detail page.
The illustrations are recreated examples using fictional data. They are not official Amazon screenshots. Amazon and Seller Central are trademarks or names belonging to their respective rights holders. This article is not affiliated with, authorized by, or endorsed by Amazon.
The content has been prepared with care. No guarantee is given regarding its accuracy over time, completeness, or suitability for any particular use case. Statutory liability remains unaffected.